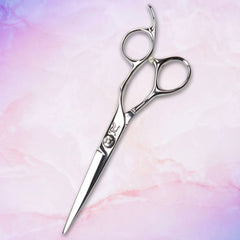
Handles come in four basic designs

Place a pair of scissors on a table and look down at it. Draw an imaginary line from the tip past the pivot (screw) through the end of the handle.
Opposing finger rings: Both thumb and finger rings are the same distance from the pivot and on opposite sides of the imaginary line.
Offset finger rings: The thumb ring is shorter than the finger ring, and both rings are on opposite sides of the line.
Crane handle finger rings: The thumb ring is again shorter and both rings are bent downward so the imaginary line goes through the finger ring.
The reason for this can be seen by holding the scissors horizontally, as in doing a scissor over comb cut. With the opposing handle your elbow is held up and away from your body. With the offset handle your elbow is lower and with the crane still lower. As with many things there is a trade-off. The crane gives less stress to the shoulder and arm, but it is awkward swinging around the opposite direction. There are also variations in the size and shape of the finger rings. Some rings are bent, and some are thick and angled. So there are a lot styles to try out.
The fourth handle is a swivel: This is where the thumb ring turns. Instead of bending your wrist to alter the direction of the scissor, you move you thumb and fingers, and the scissor moves. This is particularly good for stylists with wrist problems. There is a bit of a learning curve for the swivel, however once you learn it you will love it.
The scissor is an extension of your hand. The handle must feel comfortable, it will make your cuts easier. I think the handle is the most important part of the scissor. If it doesn’t feel good you will leave it in the drawer and get another scissor.